The importance of baking is to bake the high poly mesh on the low poly mesh. The low poly mesh can also be used as the high poly one if there’s only the low model. The paint layer and black mask are good for adding multiple colours, textures, and details because they are changeable. Except for the materials, importing images and adjusting the UV maps can also be a way to add patterns to the model. The finger grunge textures can make the material looks more natural.
Mask Baking
After using the ZBrush tool to create the model and exporting the low and high poly mesh, I import the texture resources into Substance Painter. The paint layer is good for painting and the generator is for adding detailed textures. The dirt texture is also helpful for making the textures look natural. Some particle brushes can imitate realistic simulations, like rain, broken or explosion. I connect the Anchor Point to the Micro Normal in a paint layer and instantiate the texture. This is to make the stamp has depth looking.
UDIM Tiles Workflow: Girl Baking
After baking the model by using the UDIM tiles workflow, I start to add colors and details to each model part. Adding the black mask can make the changes easily changed later, except the colors, the detailed textures like finger prints, grudges, and dirt can make the model look more realistic. I change the type to UDIM workflow in Maya as well when I connect the materials later.
I test some particle brushes to make the cloth has a burning part. Therefore, I make changes to the transmission in Maya to make the burning part looks natural. Besides, the eyeballs do not need to connect with the material images, it just needs to change the opacity as well because it is part of the main model, base on the UDIM workflow.
I choose simulation artist as my career and I want to make some experimental animation to show the requirements of this job. I have an idea about a small world in a glass, and this idea can show a series of special effect transformations luckily.
I use Midjourney to generate a series of pictures to show my idea and I use them as references to think about what techniques and simulations I might use.
I have two ideas and they are about using various simulations to compose a short animation, like fluids, melting, lightning, or explosion. I want to focus on the simulation so that using the glass idea can minimize the work on modeling. The animation will be made in Houdini as it is one of the software that simulation artists always use to create amazing animation.
Simulation Experiments
Rain Simulation
Rain Flip Book Video
I use the particle emitter to create the rain effect and make some collisions in the geometry.
Process Screen Shots
I keyframe the top network and pop network to control the activation of rain particles and liquid separately. Because the rain should touch the surface at first, and then the liquids will start to ripple.
Ripple Simulation
Ripple Flip Book Video
I use the grid as the water surface and make some ripple effects. The ripple object and ripple solver help to create the effect. I also change some parameters to create detailed effects, like the wave speed and subdivided depth.
Process Screen Shots
Explosion Simulation
Explosion Flip Book Video
This explosion comes from a semi-sphere shape. The velocity and materials such as fuel create the explosion effects. An explosion can be affected by temperature, combustion, ignition, etc. The color of the explosion can also be changed. The noise and disturbance can create a more natural exploded shape.
Process Screen Shots
I combine the explosion with the cup. Because the explosion was set on the ground plane, I use the transform node to raise the explosion higher.
Lightning Simulation
Lightning Flip Book Video
Instead of the electricity nodes, I use the points to create this lightning in a simpler way. I use some coding and change the parameters to make a poly wire at first. The noise can create a similar lightning effect and make those wires move. The ramp blend can also affect the vibration amplitude of the lightning.
Process Screen Shots
Cloud Simulation
Cloud Screen Shots
I use transformed spheres to make the base shape of the cloud and cloud node to make the cloud effects, which is easy to refine the shape of the cloud. The volume slice and volume visualization can change the density of the cloud because each part’s density in the cloud is different. The scatter shape can create a more natural cloud shape and the cloud noise can make the cloud looks more inflated.
Process Screen Shots
Wine Glass Meting Simulation Process
Glass Melting Flip Book Video
The object that means to be melted should be set as a “melt object” in viscous fluids. The particle separation can create a more detailed particle shape similar to the original geometry. If there’s any object that will have collision effects, it needs to be set as a static body. I try to use this method to make the wine glass melt, I think I need to refine the animation by maybe making one part melts first, and then the other part will melt, which means not the whole shape melts at the same time.
Melting Video
I use the flip node and pyro source to melt the wine glass. I create the group and use it as a “heater”. I change the color to inferno and it will show the rainbow color, which is easier for me to look at the temperature changes from red to purple. The melting effect is affected by different things, like the fuel and temperature of the flame point. Furthermore, the viscosity of the material is influenced by density. etc.
I cache the melting simulation into the mesh and I can assign materials to it later. I want to refine the melting to make it less fluid because it is glass material, like increase the density or viscosity.
Wine Glass Cloud Simulation Process
I animate the scale of the top sphere to make this simple cloud animation. Because the sphere connects with the cloud node, so the scale can affect the looking of the cloud easily.
Wine Glass Raining Simulation Process
Bubbling Video
I combine the cloud with the wine glass. In this scenario, I want to make some ripple effect of the liquid inside the glass, I test with some bubbling effects and will keep refine this animation.
Ripple EffectsClip NodeRefined Ripple Simulation
I use the ripple object and ripple solver to make this effect. The problem is how to make the ripple object targets the liquid, instead of the default geometry. I create two nulls and rename them to connect with the ripple object. Logically, the ripple effect should focus on the surface, so I use the clip node to control the distribution of the color dots and then refine the simulation.
Wine Glass Lightning Simulation Process
Thunder Video
In this animation, I want to make lightning and then there’s an explosion inside the glass, which is like the lightning creates the high temperature and triggers the explosion. Now, I combine the cloud, lightning, and glass objects together.
I refine the shapes of the cloud and the wine glass. In order to make the lightning look more natural, I create one more to add some changes. Those two lightnings don’t look exactly the same and I change the parameters to add details.
Thunder Flashing Video
I create a transform node and keyframe the scale to make the thunder looks like flashing.
I research some German shepherd movements to look at their postures. The creature animation is difficult to animate because animals have more sections that need to pay attention to, like ears, tails, etc.
The Unreal animation state machine allows skeletal animations to be broken up into various states, with full control over how to blend movement from one state to another.
Digging Animation Process
Digging_V01
I start to make the digging animation, which is separated into multiple states. Max as the dog character should bend at first, and then he starts to dig. I should make the cycle animation for digging movement as the player holds the button, he will keep digging until the player releases the button. The first version of the animation is a bit rigid because I just key-frame some important postures, I want to improve it to make Max looks more natural when bending and digging.
Digging_V02
In the refined digging animation, I add some rotation to the neck to make it looks less rigid. Also, I add some slight turning movement to the head. The ears are shaking slightly while digging too.
I bake the animation and test it in Unreal Engine to see the final effect.
Turning Animation Process
Turning_V01
I make this turning animation and the whole movement is like moving in a circle shape. The problem is the turning body will break the skeletons sometimes so I need to focus on the locators and ensure the legs or feet are in the right position. Another problem is after making the whole animation, the dog turns weirdly in the Z axis to be back to the original pose. I solve this by using the Euler Filter in Maya. Because the turning movement focuses on the Y axis more, instead of the X axis. Therefore, the rule should be like “YXZ” instead of “XYZ”.
Turning_V02
I refine the movement of some steps because the feet step too big. I add more movement to the tail and make it looks more curly and natural while turning.
I bake the animation and test it in Unreal Engine to see the final effect.
The inspiration for my group’s theme comes from the painting-Ophelia Death. We wanted to use this story as the starting point of our animation and find each one’s unique idea to build a connection with Ophelia’s Death.
Those images come from An’s mood board and he wants to create a kind of odd and deadpan emotions in our animation. I was trying to find the connection between my idea and my group’s.
I was inspired by two pieces of art that I saw in the exhibitions. Cornelia uses the steamroller to crush the silver objects and reformed their shapes. There is also some religious thinking shown in the installation as the silver and golden thread that hang those crushed objects have a connection with religious stories, which are sacred and holy. In Isamu’s installation, he uses industrial lanterns to convey the concept of “New Nature”. My understanding of his work is those lanterns are made of paper and came from tree material. Although they are made of industrial products, their inner nature does not change because they are still paper, which means they still resemble nature. The common points of these artworks are ” the shapes of the matter or objects are changed, but the inner nature does not change”.
My idea is Anti-Matter and I want to build a connection with Ophelia’s Death. Indeed, there are some abstract connections, like the materials of Ophelia’s sculptures because the plant and water elements are made of silver. One of the inspirations for my idea is the door element. I want to create another world in a door, which will look like Ophelia is exploring the way to death or another world. The door means “open”, although the inside world changed in the door, the concept of “open” still remains.
Story Boards
This is the complete storyboard about our group project. The story starts with the girl, who is Ophelia who goes on a journey through various places, including the grassland, lake, and finally disappears into a door. Each shot focuses on a main location and this film does base on a real-time sequence, which means it is more like a film that combines several of Ophelia’s experiences before she vanished and died.
Story Boards of My Shot
The narrative I want to tell in the shot is about a girl who enters another world. She sees something on deadwood and walked to it. A mysterious flower on the deadwood allures her to touch it. All of a sudden, the flower changes into a metal flower when she touches it. The flower keeps growing and the plants turn into a door. There is another space inside the door, when the girl touches it, she walks inside and disappears in this space. I wanted to use the footage of the second shot’s environment inside the door. Therefore, the first shot connects with the second shot, which means the girl walks into the place where the second shot is located.
AI-Generated Images
Red PoppyVine PortalDead Wood
Modeling
I decide to use the red poppy as the flower in the film. It is one of the flowers in Ophelia’s Death painting and it symbolizes death.
I use ZBrush to sculpt the low poly version of the flower and wood.
Tree BakingProcessPoppy Flower BakingProcess
I improve the models in ZBrush and use decimation to refine the structure at first, which is the high poly model. Then, I use the Zremesher to create the low poly model. The UV master can unwrap the model and I export the high poly and low poly models into Substance Painter. There were some baking issues, like some dark points appearing on the models. I solved those problems by dragging the models to avoid UV overlapping on high poly models. The most important thing is to make the high poly model perfect, and then create the low poly model, which can reduce the error possibilities.
I use Substance Painter to make some materials for the poppy flower, which I learned in the Toolkit course. I use the fill layer instead of the paint layer, add the black mast, and “add paint”. This could help me to change some parameters easily and it works similarly to the black mask in Photoshop. I also create some heights for my strokes as the patterns on the flower.
I refine the flower shape and sculpt some new flower buds that can use in my scene.
Vine Animation Testing
I use the nurbs curve and normal curves to make the vine by extruding them. The result was not successful at the beginning because there were some stretching problems.
Process screenshots
I fix the problem by changing the parameters of “extrude” and create those tubes as polygons at the beginning.
Process screenshots
Another way is to use the sweep mesh tool to create multiple vine-shaped tubes at once and connect them with the curve. This method looks like squeezing the tubes, and the vines look squeezed instead of growing, but it’s very convenient. The leaves will eventually cover the vine, so I want to try this method to combine with the leaves.
Process screenshots
Animation
I use the paint effects in Maya to make the leaves animation. I “make alive” the polygon at first and draw some curves on it, then I attach the brush to those curves. There are various parameters that can create different kinds of leaves and the max value can control the growing parts of the plant.
Process screenshots
I render the vine brush to see the effects. I think the following question is how to manipulate those leaves into a metal material, maybe I will try to recreate the leaves’ image and organize them in UV.
The problem during the render process is that Maya cannot recognize the brush tool as it can recognize the polygons and objects assigned with Ai standard surface. Therefore, I converted the vines into polygons and connect some nodes in Hypershade.
Leaves parts are slightly different from vines because there are black parts around them and I need to make them transparent. Then, the leaves cut out shape will appear. I also fix this problem by connecting the nodes in Hypershade.
Portal Animation_V01
I use the techniques from above to make this portal animation. The ivy plants will grow when the vine grows. I think the improvement might be to make the ivy looks more natural because they look a bit symmetrical right now. I’m going to add the flower into the scene as well and it will have slight movement to match the plants. The length of the whole animation should be made at the same time as the real-life footage as well.
Portal Animation_V02
I refine the portal to make it look less symmetrical. Besides, I add some curly curves to make the plant-growing animation, which makes the whole animation looks more natural.
I export the rendered image sequence and my group member helps to import them into Nuke. This render test is not perfect and still needs improvement, like the materials, lightings and the location of the portal. I put a plane under the portal wood and use the Ai Shadow Matte material on it, which can create some shadow and reflection for the wood to make it looks natural.
Rendering
I use a vine leaf image and create the metal material in Substance Sampler, which can create the material changing effect in Maya.
I set the layer settings and render settings to render the wood and plant separately. The reason to do this is because the materials are quite different from the wood and metal. They have different reflection, so it would be easier for VFX student to combine them in Nuke.
The vine portal will change to metal material in the end. Also, we are going to combine the animation as a layer on top of the real-life footage. Therefore, the background should be transparent, which is alpha. I use a color blend material in Maya to complete the changing process, and copy the same parameters in each layer, like base color, normal map, roughness, emissive. etc.
I rendered a render test and combine it with the real-life footage to see the final effect.
The VFX student combined my rendered image sequence and real-life footage in Nuke to see the render test. There are still some parts that need to be refined, like the wood should be moved lower or it looks like floating. Besides, the second shot needs to be tracked to match the touching movement better. Furthermore, the vine and flowers should be improved to look less dark.
I made the environment in Maya to imitate the real environment in a house. The parameters are important because they can influence the visual effect, like the focal length. After making the environment, I used the HDRI png to apply it to the sky dome light.
In order to make the more realistic lighting, I used the disk shape area light to imitate the ceiling lamp inside the room.
I created different render layers and this can render the train and its shadow separately.
Week 2: 360 HDRI Shooting
I shoot multiple pictures from different angles in the school dining hall and use PTGui to merge these images together.
I used Photoshop to fix the broken part. I think I should pay more attention when shooting to avoid the objects like shoes or moving humans.
Set Camera Track In Maya
I import the camera track in Maya and use a few objects to create a real-life-looking 3D scene.
I filled the particles inside the containers made of polygons. I used the “set for selected” function in the fields-initial state, which means the particles can stay still inside the container at the beginning. Then I made an animation about a bucket pours the particles inside a mother cube container.
Cloth Effect Particles
Flying Torus Particle Animation
I made the animation at first and used the torus to make it into a particle emitter.
Bifrost Fluids Simulation
I use the Bifrost Fluids system in Maya to create the liquid simulation. The sphere is like a water source that creates the particles, and I make them into blue colors.
Ball Dropping
I make a cube shape liquid at first and set the ball as the passive collider. Therefore, when the ball falls into the swimming pool, it can collide with the water.
Screenshots
Fur Simulation
ThinDense
I use the XGen system to create fur simulations. The density multiplier can affect the fur density, which is shown in the pictures that one is dense and another one is sparse. I turn on the checker pattern to see the differences clearly.
I change the base color pattern to make another kind of fur.
Playblast with no collision
There is a glitch in Maya 2022 and there is no collision objects tab under the XGen editor, which means I cannot try to use the XGen to make the ball collides with the landscape. However, I rendered the grass by using the XGen fur simulation and making the ball collides with the plane.
I used the cat image sequences as a background to make the rotoscoping. I made each part of the cat separate, like the head, body, limbs, and tail. After rotoscoping all the sections, I added the colors and backgrounds. Also, I applied the motion blur to all the layers. One of the important things in this practice is the movement of the camera because the background needs to be animated if the real-life footage moves. Therefore, I should also consider the camera movement in my later project while filming. The rotoscoping helps me to identify the changing point of the cat’s important movement.
Bird Flying Through A Color Wheel
Bird Flying Through A Color Wheel
Throughout this practice, I made the mask for this black-and-white image at first. Because the black-and-white image does not have any colors, I created the mask by connecting one of the color channels with the alpha channel.
Then, I made the mask on this image to just use a single bird to make the animation. I keyframe the position and angles of the bird to complete the movement.
Week 2: Compositing 3D
Final 3D Composition
I followed the tutorial to rebuild the “Beauty” mode in Nuke. The purpose of this practice is to bring different render layers into a real-life scenario. There are different render layers, like normal, ambient occlusion, metal, etc. When connecting the nodes in Nuke, I should pay attention to the alpha channel and composition size. Each shuffle node is like a node that collect a single piece of information from the render layer, and the merge node combines that information together to recreate the “Beauty” mode. Therefore, the rebuild beauty node should look exactly the same as the render layers if this process is successful.
Sunny Track Practice
Final Outcome
I use free camera footage to practice camera tracking. I place two polygons in the 3D scene to see how the 3D objects can combine with real-life footage.
I make the automatic camera tracking at first and change a few parameters. The point cloud system can show how many tracker points in the scene and they are also shown in the 3D scene in Nuke.
In order to track accurately, I measure the approximate length of a few bricks in the footage and choose some tracker points to create small polygons for checking. After tracking the camera, there is a real-life kind of pixel effect in the 3D scene, which imitates the real-life scene.
I place a cube and a cylinder in the 3D scene and change some parameters about them to make them look more realistic in the footage, like movement, rotation, etc. Sometimes I need to rotate the 3D scene as well to make the XYZ look normal.
In this animation, I use the rigs to make this character lifts a heavy box. Firstly, I use the locators to make the parent constraints of her hands and the box separately. Then I do the mockup. I think the challenging part is how to mock the accurate postures and gestures because they are very detailed. For example, the bending waist is very important and it changes when the character begins to stand. The angle of the head can also show she is using strength to lift. I think I should improve the part when she stands up more. Because there are many waist controls and key framing them separately can make the animation looks smooth, instead of using just one waist control to bend her body.
Week 7 Throw a ball animation:
Before making the animation, I import the png sequence into Maya as the reference. I mock up the keyframes of some postures first, and then I play the video to see if the postures match with the reference. I use the Euler Filter to clean the messy movement, like the rotation of the arm which throws the ball. In order to make the ball fly away from the hand, I use the parent constraint at first. In the frame when the ball flies away from the hand, I use blend parent to make the ball move by itself. I improve the starting pose and make the character looks balanced and won’t fall.
Week 8-9 Pantomime acting animation:
In this animation, I find a pantomime acting as the reference to mock-up the rigs. I animate the rough body movement first, and then I keyframe the gestures and facial expressions. I think the lips are difficult to animate because the mouth shape is hard to match with the pout. The eyebrows are changing too through the animation and they move up slightly when the character pouts at the end.
Week 10-11 Lip sync animation:
Before making the lip sync animation, I use the rig to practice for mocking up a short-acting reference. Through this process, I practice mocking up the eyes, lips, head, and slight body movement.In this playblast, I find an acting reference and mock-up of the lip sync animation. I think the challenging part is to mock up the mouth shape accurately with the words, like vowels and consonants. Because the lips are not the only things that affect the effect, the jaw and the cheeks also have an impact on speaking, which means more things to consider at one moment. Sometimes, the lips go out or inside slightly which depends on the pronunciation. I make the eyes, head, and slight body movements after working on the lips. I think the improvement should be more detailed things, like the tongue as well.
I made a chain effect to let it bump into the brick wall. The wall is the passive collider and the sphere chain is the dynamic rigid body. Because it’s a brick wall, each brick should use the cube shape in collision attributes.
Shatter effect:
I used the same sphere chain to let it bumps and shatters a cube. The cube is made with a solid shatter effect. Also, the initial sleeping effect should be turned on at the beginning. There are other parameters that can affect the final result, like collision shape margin, glue-breaking threshold, and max constraints per body.
Ncloth Animation
In this animation, I constrain the cloth to the pole and then change the wind’s parameters to make the flag waves.
I make some mind maps for the ideas generation and each of them is based on a keyword.
BirthAn old objectCamouflage
Mood boards:
https://miro.com/app/board/uXjVPQv19TE=/
After choosing the egg narrative as the one I want to develop further, I research some 3D artworks and references to get inspiration. I find Lisa Jørgensen’s interior design works on Artstation and I like the cozy and rosy ambiance in her scenarios. Also, I find some 3D models as references in sketch fab to think about the characters and models that I will make in my animation. The kicking and walking parts are important so I find some chicken-hatching videos and baby image references.
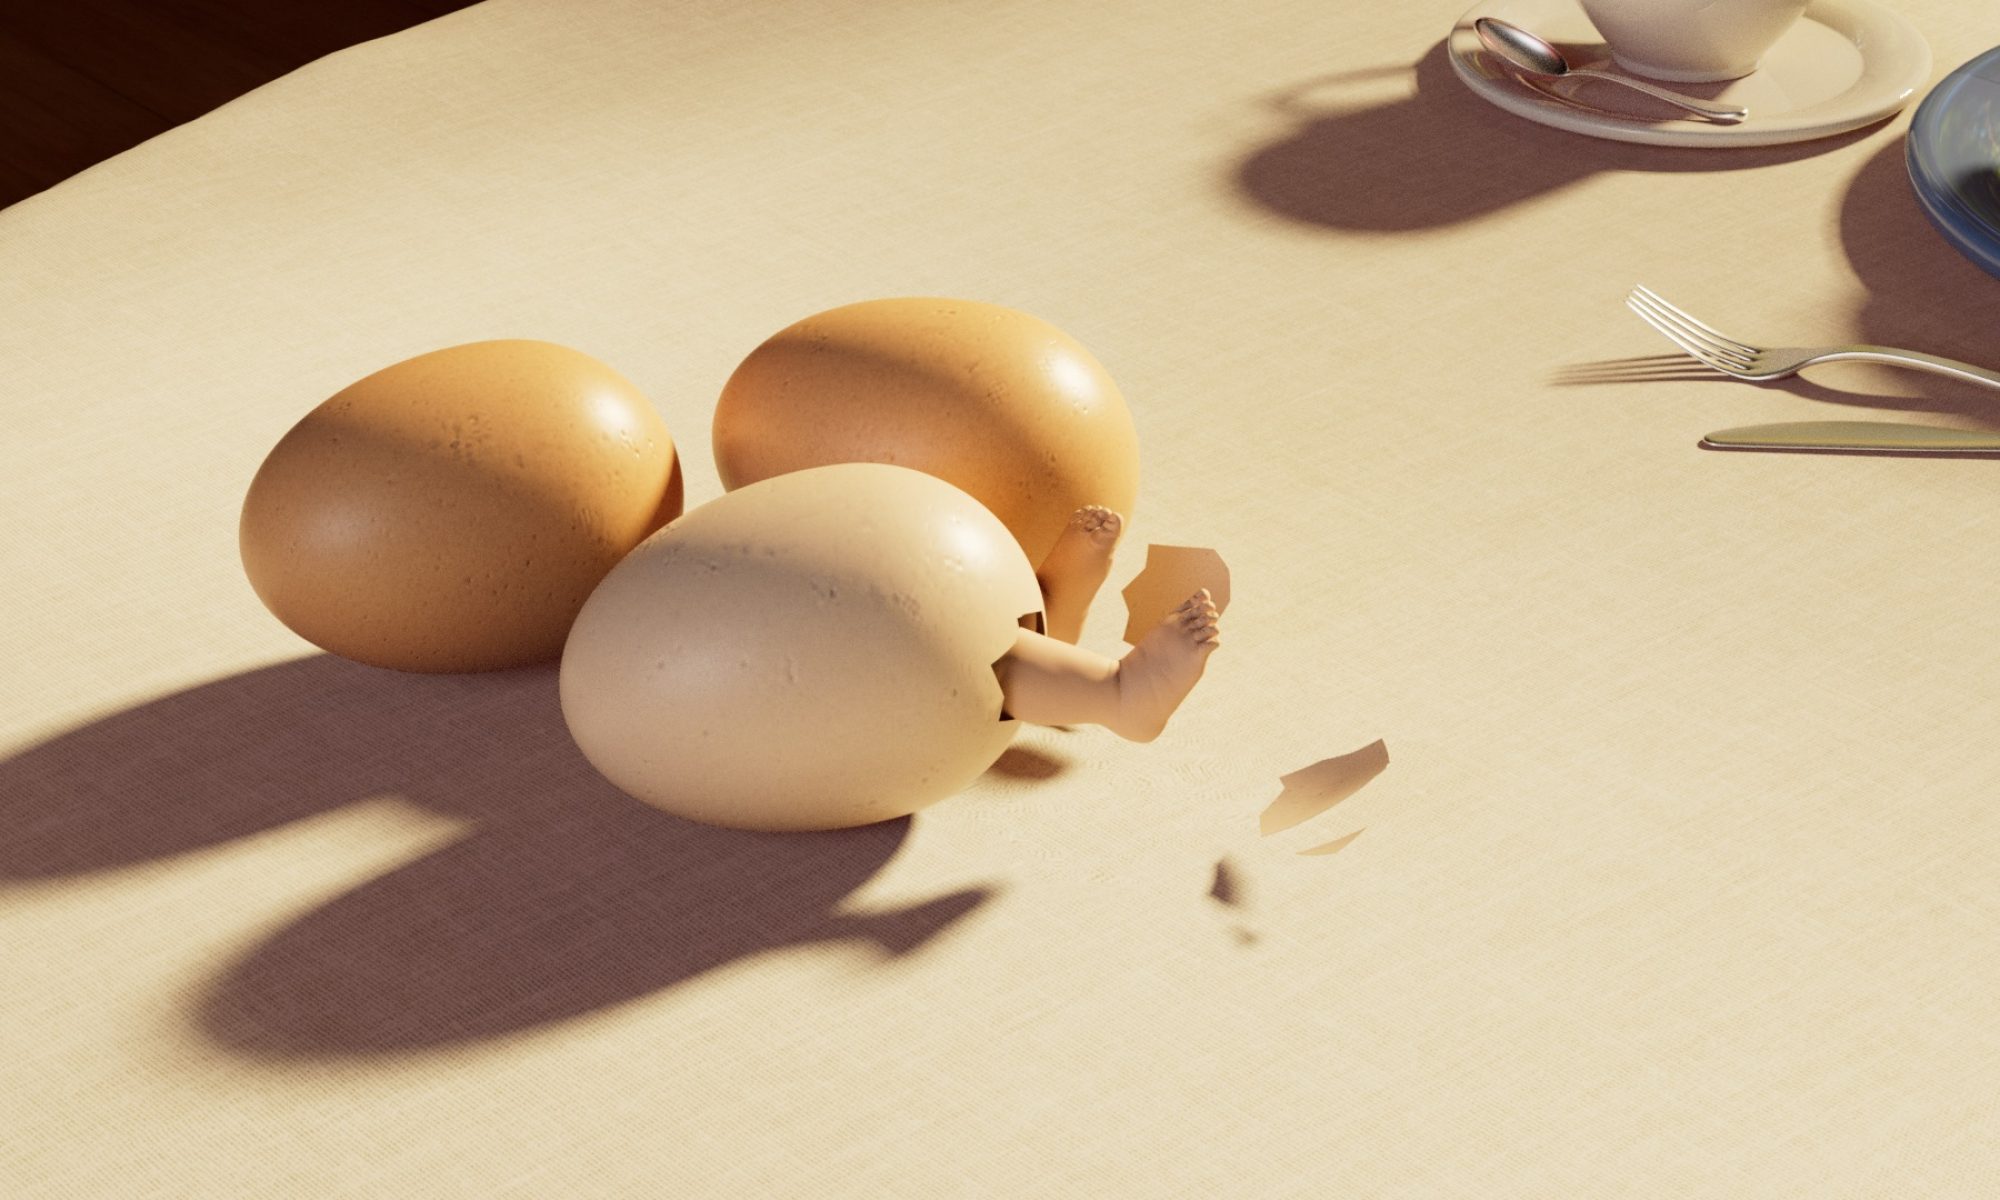
Birth: This story is about a beautiful and cozy time at home, there are a few eggs placed on the table. One of the eggs spins and suddenly two baby legs kick out of the eggs. He holds strength, then he stands up and walks away with his bare and clumsy feet. I want to create a warm ambiance in my animation. The techniques of this animation should be kicking, walking, and some passive collider animation with the tablecloth. I think those are basic but classic animations to start with, so I decided to choose this story as the one to develop further.A cup of coffee: This story is about in the morning, there’s a cup of hot coffee ready for a drink and some desserts for serving as well. There is hot steam comes out from the fresh coffee. After a while, the coffee begins to bubble and more and more bubbles come out from the cup. Suddenly, a shark comes out of the coffee and its fin changes the coffee into the blue water. The hint in this story is about the bubbles coming from the shark in the coffee, but it’s impossible to imagine there is something alive in the normal coffee that we drink every day. The “sea” pattern on the cup also connects with the ending of this narrative. The techniques of this animation should be the liquid, swimming animations, and some VFX effects as well. I think the liquid thing might be challenging to start with and the bleeding of water color changing would be difficult. Camouflage: This narrative is just like its name, “Camouflage”. The plot is about there being some avocados on the table. The camera starts to shoot close up and inside those green textures, an eye opens and blinks. In the end, a chameleon crawls down from this bunch of avocados. The point of this story is the chameleon already hides in those avocados at the beginning, which means what you see is not always what you see and there might be something special inside them.
Storyboards developments:
Before making the animation, I develop the storyboards into different versions. I draw different perspectives to think about the connection between each image and the changes in cameras. I draw those storyboards by following some camera theories, like the rule of thirds.
Rough sketches:
I draw rough sketches about how the egg character is going to shake, kick, stand and walk away. Because his posture is from lying to standing, which means he needs to hold a lot of strength to stand up, like a strong athlete with motor skills. Also, I want to make him a baby character to make the story feels cozy and adorable, the baby walks should be slightly clumsy and slow.
Video references:
In order to test if it’s possible that the egg character can stand from a lying posture and then walk away, I record a video by myself and I try to stand up to see if it’s working. Also, I used this video as a reference for making animation.
Also, I spin the eggs and record them as a reference to see how the egg shakes in real life.
ZBrush model sculpturing:
sculpting processI sculpt the legs in ZBrush for the egg character in my animation. I first follow the foot and leg sculpturing tutorials to sculpt the basic shapes. Then, I added more details for the toe gaps, curves, and some inflating mesh parts. I put the baby images on the side to use as references. After sculpting the foot and leg separately, I combine these two meshes using the dynamesh tool to smooth the whole shape. I think the most challenging part is the feelings of baby legs because they are more fat and round than adult legs, which means a lot of curves should be decreased on the legs. Also, the toe gaps are difficult to separate, but I use the boolean tool to solve this problem. I import the UV map of a leg from Maya to get a more standard UV map for later baking. Projecting the UV map on the leg that I sculpted can make it into a more standard structure. I save the low poly leg for animating and the high poly leg for baking.Then, I import the leg into Substance Painter to bake the mesh maps and assign the basic skin material as well. The UV map I did before also works at this stage because the baking process might have problems if the model’s structure isn’t equally distributed. Next, I export the mode, and textures, and import them into Maya. I make some links in Hypershade to assign those skin textures and make them work. Finally, the legs are shown with skin textures in Maya.final leg
Rigging process:
I make the FK handles and then the IK handles. Because the two legs are symmetrical, so I duplicate the right leg’s joints on the left leg. The IK handles are a bit complex to make, but they can make the knees bend when the feet lift. Also, they can make the feet stand on the ground. After duplicating the joints, I bind the mesh with the rigs. I try to lift the feet to see how it works and the mesh looks squeezed, but I use the weight painting to solve this problem. Also, I use some curves to make the controllers for the legs, egg mesh, and the whole character, which is the main control. The main control should not be animated, but it can change the location of the character. Because it can bring the whole animation to any place, so it should never be animated.final leg rig
Animation:
I make the kicking and walking animation at first. I try to project the curve on the egg to cut the egg crack pieces, but then I realize the multi-cut tool is easier to cut. I extract the egg crack from the whole egg mesh. I make the kicking and walking animation at first. I try to project the curve on the egg to cut the egg crack pieces, but then I realize the multi-cut tool is easier to cut. I extract the egg crack from the whole egg mesh.By using the video references I recorded before, I make the walking and kicking animation. Because the posture changing needs a lot of strength, I make the feet hold for a while and the character stands up slowly to match the physics. The egg crack part is a bit complex to do. Although I extract the crack parts from the egg mesh, they are still connected when the character walks. Therefore, I duplicate a group of egg cracks and use the visibility function to make them look like staying on the ground. I keyframe the positions of the cracks.I follow the same theory of waking animation as I made before. The difference between my animation and the standard walking cycle is the character should walk naturally and not in a uniform motion. Also, he should walk fast at first and then walk slowly because of the anticipation and the strength he gets when standing up. Throughout the whole animation, I reference the character instead of using the original rigs because this can let me change and have the backup of the character.walking animation playblast
Environment:
home scenarioI want to create a home scenario and this story happens on a table in this room. I make some cutlery and furniture.I set three cameras between each shot. I think the challenging part is how to use camera language to connect each shot together. The camera views I use at first are very flat, but then I change them into bold angles, like the close-up of the legs. Also, the shot should switch between the motion change, like the first shot can switch to the second shot when the character kicks out of the egg; the second shot can switch to the third shot when the character begins to stand. Therefore, the audience can feel the motion of the character leading to the camera switching. In the beginning, I set the camera in a pan view to show the whole environment. I set the camera to follow the character at the end and make it shoot slower than the character walks, like behind the walking animation. animation playblast
Cloth Animation
Ncloth Passive Colliders TestI want to add the details for the cloth on the table like there will have slight depth when the character stands and walks on the tablecloth. I test the ncloth firstly and make the character a collider to interact with the cloth. This video is a ncloth test video to see how the cloth is raised by the character. The problem is that ncloth simulation is difficult to run fast and change. Therefore, I use another method to solve this problem.I use the shape editor to control the shape changes of the cloth. As for each target, I use the sculpting tool to make the depth of the foot stepping on the cloth. The target can also be keyframed and it looks like the footsteps in the cloth. The keyframing also works when the foot lifts because normally the cloth should bounce back a bit.
Dub
I make some sound effects by manipulating the objects, like pinching the crisps to imitate the hatching sound. Also, I step on a piece of cloth to make the standing and walking sound. I edit the sound in Premier to reduce the environmental noise and combine the image sequence in After Effects for the final outcome.
Rendering
I add the lighting and several simple materials in the scene before rendering. Because I want to create a warm and cozy ambiance, I change the light to yellow color. I think there are a few things that need to be improved, like the footprints’ depth on the cloth can be deepened and more obvious. Besides, the cloth seems to blend with the character and whole environment, so I’m thinking if I can experiment with different colors and textures to make a better visual effect.render previewI improve the lighting by changing the intensity to 1 and the amount of exposure to make it look more realistic. Also, I rotate the HDR doom light to experiment with different shadows and details in the scenario. For example, there are subtle details about the reflection f the cutlery and porcelains. I make the shadow edges look blurry and more natural.I assign the textures for the models and use Hypershade to make the textures connect together. The Substance plug-in in Maya is convenient for assigning textures. Because there are noises in my scene, I increase the quality settings to decrease them. I try to use denoiser at first, but the final outcome looks shaky and I just increase the quality of rendering, samples of doom light, and other parameters to solve the problem.